Our Mini Sunroom Makeover: The Big Reveal
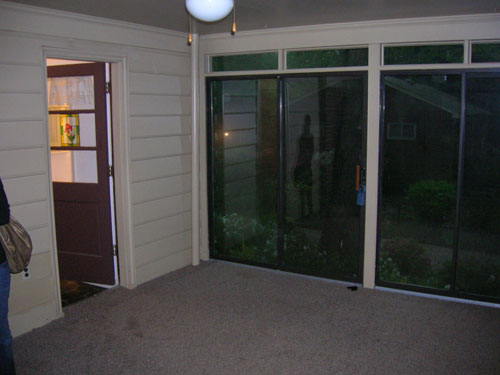
After giving our floor stencils a full seven days to dry (it’s humid here!) we finally moved all of our furniture back into the sunroom and snapped a few photos of the whole room after our three phase mini makeover (see phase one here, phase two here, and phase three here). First let’s take a look back at what that room looked like when we purchased the house four and a half years ago. Yeah, it had a thin matted rug that smelled like dog. Enticing, we know.
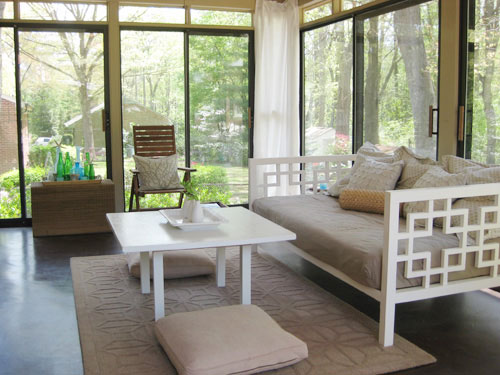
So we pulled up the rug (the very first day we moved in) and stained and then later painted the concrete floor. It was definitely a slow evolution in there, but the great views made it one of our favorite places to hang out pretty much from day one (after that stinky carpet was gone of course). Here’s the room as it looked about a month ago before our mini makeover began. There’s no denying that it was serene in there, but with tan walls, a tan rug, tan floor pillows, a tan daybed cover, tan pillows, a tan ceiling, some brown furniture, a brown floor, some white curtains, and some white furniture it was feeling a little flat. So we wanted to keep most of those neutrals but add a little color and fun (without spending over $150).
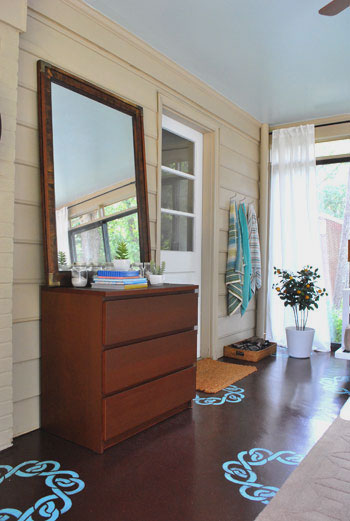
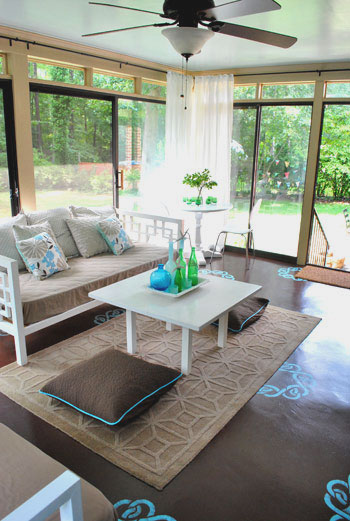
Now here’s the room as it looks today, after we added a dresser from another room, painted the daybed, hung sleek looking curtain rods, painted the ceiling, and stenciled the floor (read about those projects here, here, and here). Note: This room definitely looks different in person than it does in these photos. It’s hard to explain, but the floor is just one plane, and the view out of the glass doors is three planes, so the view is definitely is a lot more emphasized in person than the floor stencils (but in the pics the view is sort of diffused thanks to the reflective glass and the stencils are extremely high contrast for some reason). We’ve had friends and family members over (even extremely “reserved” ones) and they all love the floor- going as far as to describe it as a subtle change and the entire room as a soothing space. Sometimes things are just hard to capture in photos!
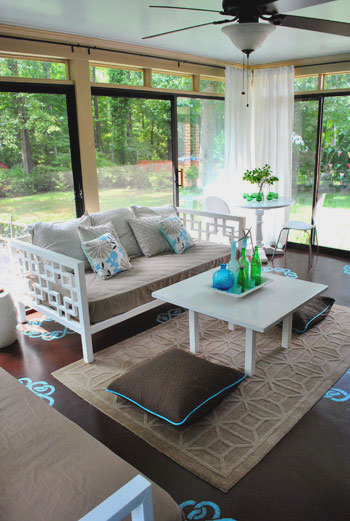
We love how the splash of aqua on the floor complements the sky blue ceiling (which really makes the room feel much more open and airy).
We also love that we gained tons of storage (for everything from board games to baby toys) thanks to this dresser that used to live in our guest bedroom before we turned that into an office/guest bedroom/playroom (see that transformation here).
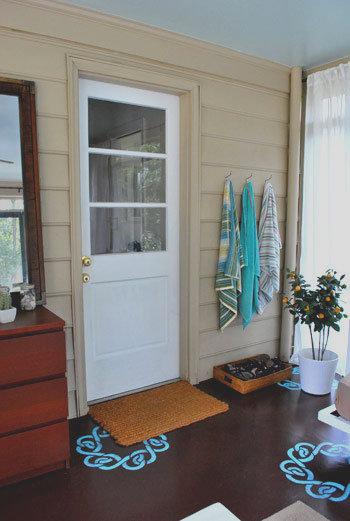
In the small tweaks category, we tossed a few colorful beach towels on our towel hooks (read more about why we need those here) and moved our fun faux orange tree over into that corner near our shoe basket. I DIYed that tree over five years ago in NYC when I needed greenery in my apartment but everything kept dying, so thanks to a few fake stems from Pier1 I was in business (I actually “planted” them in real dirt inside of a cheap Ikea planter). I know it’s odd to be attached to a strange little faux orange tree but it definitely has a special place in my heart. Although in my defense many people think it’s real and don’t believe me when I say it’s fake- maybe it’s the real dirt, haha.
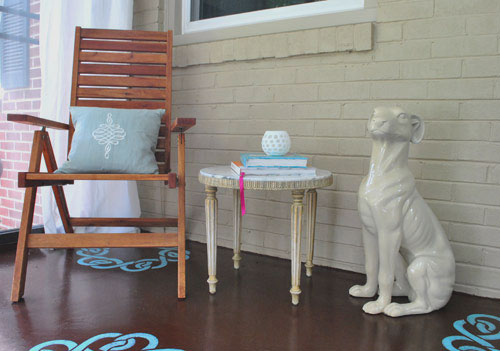
And we can’t forget our corner with the cheap-o marble table that we snagged a while back (read about that here) and my beloved ceramic pooch, which I still consider to be a major steal (learn more about him here).
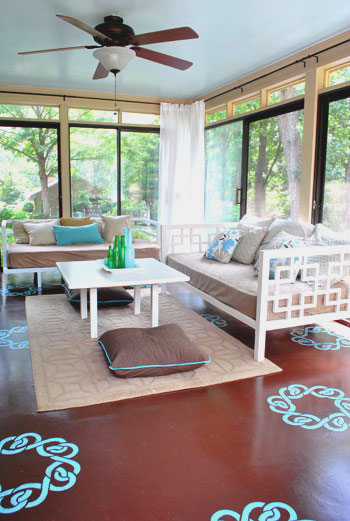
We really like how the floor stencils peek out under the doormats, the area rug, and even the daybeds (thanks to the fact that they’re both on legs, so you can see the stencils running under them). And thanks to the fact that the majority of the furniture and accessories are still tan and white, the touches of blue and green that we added really feel playful and add dimension without being too much (especially in person, again, photographing a room with three glass walls was tough for us). We also love that we can change them all out if we ever tire of them. The floor and ceiling are just paint, which is cheap and easy to redo- while the accessories are even easier to swap out on a dime and in a moment’s notice.
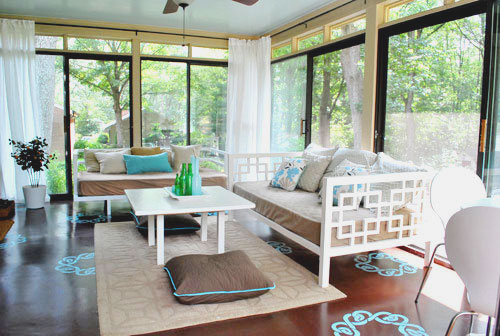
Oh and speaking of small accents, we picked up two $6 floor pillow covers (snagged on clearance at Bed Bath & Beyond, down from $19 each- they’re actually just square Euro shams that happened to fit right over our old floor pillows from Target).
We figured that $12 upgrade added a bit more subtle contrast to the middle of the room (see how the old ones blended in a lot with the rug in the before picture?) so we’re happy we switched those out at the last minute. And should we ever want to take them back to the more neutral looking pillows of yore that’s a nice easy swap, which we appreciate. Speaking of $12, here’s the budget breakdown for this mini makeover of ours:
- $0- Dresser and mirror (leftover from old guest bedroom)
- $0- Second daybed (leftover from third bedroom which is now Clara’s nursery)
- $0- primer and paint for daybed (already owned- see that painting tutorial here)
- $20- Ceiling paint (Tide Pools by Behr in semi-gloss for sheen)
- $40- Curtain rods from Ikea (these without the finials)
- $20- Glidden oil-based porch/floor paint for stencil (color matched to Martha’s Lagoon)
- $30- Ceil stencil purchased from a local paint hero of ours
- $7- Sponge for stencil project
- $12- Floor pillow covers (clearance square Euro shams from BB&B)
- Total budget: $129.00
Not too bad considering that we updated everything from the furniture to the ceiling and even the floor. And small changes like those new curtain rods and the painted daybed really make all the difference. Surprise, surprise- we find ourselves out in the sunroom even more these days. Just soaking up the view out the window and taking in the scenery inside, too. We also find Clara staring at the stencils like she’s hypnotized. Kind of making this face. Hysterical. Apparently the girl already appreciates fun home decor. And if we ever tire of anything we can always paint it/replace it in a few quick phases without breaking the bank- just like we did these past few weeks. Woo hoo for inexpensive changes that make you smile.
What about you guys? Do you have any mini makeovers in the works? Are there any sunroom transformations going on at your house? Have you ever plated something faux in real dirt? Spill it.
Psst- Wanna follow along with our sunroom mini makeover from day one? Here’s the first phase, the second phase, and the third phase.


Komentar
Posting Komentar